How to Clean a CPAP Machine: From a Long Time User

Cleaning is the part of CPAP therapy most people get wrong, and I’ll be the first to admit I was one of them. When I started therapy more than a decade ago, with an AHI of 51 and a brand new ResMed machine my doctor had set me up with, I treated cleaning like an afterthought. I was wearing the mask every night, my sleep was finally restful, and the equipment looked clean enough. Wasn’t that the hard part done?
It wasn’t. The mask sits on your face for seven or eight hours a night. The hose carries warm, humid air directly into your airway. The water chamber sits in a heated machine all day. If you don’t clean any of it, you’re not just being a bit lazy. You’re undermining the therapy that’s keeping you alive.
This is everything I’ve learned about keeping a CPAP clean over the better part of a decade of nightly use, written in plain language without the fluff. Quick disclosure before we go further: my background is computer science, not medicine. What you’re getting here is the experience of a patient who has used a ResMed AirSense 10 at home and a ResMed AirMini for travel for years. For medical advice, talk to your sleep specialist.
Why CPAP Cleaning Actually Matters
Your CPAP creates the kind of environment microbes love. The mask cushion absorbs facial oils and dead skin every night. The humidifier holds standing water. The hose stays warm and damp from the air you breathe. Skip cleaning long enough, and that combination becomes a problem you can smell before you can see.
The short term consequences are uncomfortable but manageable. A neglected mask cushion smells stale, irritates skin, and stops sealing properly because oils break down silicone. A dirty humidifier chamber clouds with mineral deposits and starts harboring bacteria. A hose that never dries out can grow mold inside, where you can’t see it.
The longer term consequences are the ones worth taking seriously. The Sleep Foundation and other respiratory health authorities link poorly maintained CPAP equipment with increased risk of sinus and respiratory infections, skin irritation, and reduced therapy effectiveness from mask leaks caused by degraded cushions. None of those things make CPAP therapy easier to stick with, and the goal is always to make therapy easier, not harder.
There’s also a financial side. CPAP parts aren’t cheap, and insurance only covers replacements on a fixed schedule. Destroy a humidifier chamber by using tap water, or rip a cushion because the silicone is brittle from the wrong cleaner, and you’re paying out of pocket until your next coverage window opens up.
The Supplies You Actually Need
The cleaning industry would love to sell you a kit full of specialty products. You don’t need any of it. After years of doing this, here’s the entire list:
A bottle of mild, fragrance free dish soap. Plain Dawn or its store brand equivalent works. Warm tap water for cleaning. Distilled water for the humidifier chamber, which is non-negotiable and I’ll explain why below. Distilled white vinegar for monthly deep cleaning. A clean towel or two for drying. A long, narrow brush for the inside of the hose, the kind sold for cleaning baby bottles or aquarium tubing.
That’s it. The whole kit costs less than a single bottle of CPAP-branded cleaning spray and lasts for months.
A few things to actively avoid. Antibacterial soaps leave a residue that you’ll then breathe in for hours. Scented soaps can irritate your airway. Bleach and alcohol degrade silicone and shorten the life of your mask. Baby wipes leave a moisturizing film that breaks the mask seal and traps oil underneath. And dishwashers are too hot for silicone, no matter what cycle you use.
If you want a more detailed look at products worth keeping on hand, my CPAP cleaning supplies post goes deeper.
The Routine That Has Worked for Me
The trick with CPAP cleaning isn’t intensity. It’s consistency. A small daily habit beats a heroic monthly scrub every time, because daily cleaning prevents the buildup that monthly cleaning has to chase. Here’s the rhythm I’ve settled into.
Daily
Every morning, the mask cushion gets rinsed in warm water with a small amount of mild soap. This takes about a minute. I rinse it thoroughly until the water runs clear, then set it on a clean towel to air dry while I’m getting ready for the day. By bedtime it’s bone dry and ready to go.
The water chamber gets emptied completely every morning, not topped up. Standing water that sits in a warm machine all day is exactly the situation you want to avoid. I tip it out, give it a quick rinse, and leave it open to dry. At night I refill it with fresh distilled water.
The exterior of the machine gets wiped down with a damp cloth roughly once a week, mostly to keep dust out of the air intake. Never spray anything directly on the machine. It’s sealed electronics, and moisture inside is the kind of problem that ends with a new machine.
Weekly
Once a week, everything comes apart for a proper soak. I pick a morning when I’m not rushing, usually a weekend. The mask separates into cushion, frame, and headgear. The hose disconnects from both ends. The water chamber comes out of the machine.
All of it goes into a basin of warm, soapy water for about half an hour. While it soaks, I run the brush through the inside of the hose a few times. The first time you do this, you may be surprised what comes out. After the soak, everything gets rinsed thoroughly. Soap residue you can’t see is soap residue you’ll breathe, so I rinse longer than feels necessary, until the water runs absolutely clear.
Then everything air dries completely before reassembly. The hose hangs vertically over a shower rod or towel rail so water drains out. Mask parts sit on a clean towel. The chamber dries upside down. This usually takes a few hours, and reassembling anything before it’s fully dry is how mold gets started inside a hose. If you only take one thing from this article, take that one.
Monthly
Once a month, the water chamber gets a vinegar rinse. I mix one part distilled white vinegar with three parts warm water, fill the chamber, and let it sit for about twenty minutes. This dissolves the fine mineral deposits that regular soap doesn’t touch, even when you’re using distilled water. Then I rinse the chamber thoroughly several times until the vinegar smell is gone.
Monthly is also when I check the disposable filter and replace it if it looks gray or dusty. If your machine uses a reusable filter as well, that one gets a gentle rinse in plain water, no soap, and a long air dry.
While I have everything apart, I do a visual check of the cushion edges for cracks, the hose for any stiffness or discoloration, and the headgear elastic for stretching. Catching small wear early is much cheaper than dealing with a leaking mask at three in the morning.
A Closer Look at Each Component
The mask and cushion
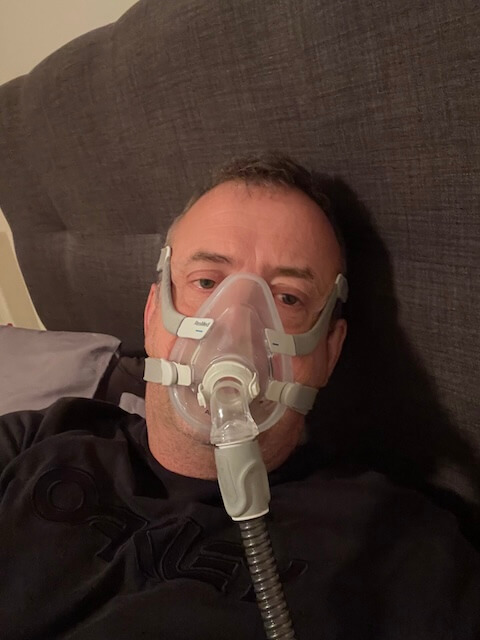
I’ve used a full face mask for years because I’m a chronic mouth breather, and full face cushions need a little more attention than smaller masks. Oils collect in the fold where the cushion seals against your cheeks and chin, and that’s where you’ll first notice a smell or a slick feeling if cleaning has slipped.
Daily warm soapy water plus weekly soaks handle this in almost every case. Don’t scrub aggressively. Silicone doesn’t need it, and rough scrubbing creates micro abrasions that hold bacteria better than a smooth surface does. Don’t use hot water either. Heat warps silicone over time and shortens cushion life.
The headgear straps absorb sweat and need a wash too. They go in the same weekly soak as everything else. Air dry flat so they keep their shape.
The hose
The hose is the component people most often neglect, partly because it’s hard to see inside. Once a week, soak it, run the brush through, rinse thoroughly, and hang it vertically to dry. If you have a heated hose, the same routine applies, but be careful not to submerge the electrical connection at the end. Wipe that part with a damp cloth instead and let it dry completely before plugging back in.
Hold a clean hose up to a light occasionally and look down through it. It should be clear with no visible residue or spots. Anything you can see in there has been in your airway, and that’s a sign the cleaning routine needs to step up.
The water chamber
This is where I have to be very direct: use distilled water. Not filtered. Not bottled spring water. Not tap. Distilled.
Tap water contains minerals that don’t evaporate when the humidifier runs. The water becomes vapor, but the calcium, magnesium, and other minerals stay behind and bond to the plastic. Within a few months you’ll see cloudiness that no amount of vinegar or scrubbing will remove. At that point the chamber is permanently scaled, the humidifier runs less efficiently, and bacteria find more surface area to colonize on the mineral deposits. A gallon of distilled water costs about a dollar and lasts roughly a week, which is far cheaper than replacing chambers. There’s a longer explanation in my distilled water for CPAP post.
Empty the chamber every morning. Wash it weekly. Vinegar rinse it monthly. Replace it on schedule even if it still looks fine, because plastic degrades whether you can see it or not.
Filters
Most ResMed machines use a small disposable filter that sits in a slot on the back. These are paper based and cannot be washed. Trying to rinse one will turn it into a pulpy mess inside your machine. Replace them on the schedule in your manual, usually monthly, or sooner if the filter looks visibly dirty.
If your machine also uses a reusable foam filter, that one gets a weekly gentle rinse in warm water, no soap, then a thorough air dry of several hours before going back in. Squeeze gently to push water out. Don’t wring it.
The machine itself
The exterior just needs a wipe down with a damp cloth occasionally. Pay some attention to the air intake area, since that’s where dust accumulates. Never spray water or cleaner on the machine, and never try to open it up to clean inside. There’s nothing in there that benefits from cleaning, and plenty that breaks if it gets wet.
What About Cleaning Machines?
You’ve probably seen ads for ozone or UV light CPAP cleaners. They market themselves as a hands off, hospital grade alternative to soap and water. I looked into them years ago and decided against, and the FDA’s position has since reinforced that decision.
The U.S. Food and Drug Administration has not authorized any ozone or UV light product to clean, disinfect, or sanitize CPAP equipment. In its consumer guidance, the FDA states plainly that most CPAP accessories such as hoses or tubes and masks can be cleaned with only mild soap and water, and that the agency has received reports of unexpected asthma attacks, headaches, and breathlessness after using devices claiming to use ozone gas to clean their CPAP. The American Academy of Sleep Medicine has echoed this guidance, and you can read the FDA’s own consumer page here.
The reasoning is straightforward. Ozone at concentrations high enough to kill bacteria is also high enough to be harmful to humans. UV light requires direct line of sight, which is hard to achieve inside a folded mask or a coiled hose. Soap and water work, are cheap, and have decades of evidence behind them.
If physical cleaning is genuinely difficult for you due to mobility issues or arthritis, talk to your sleep specialist about your options. For everyone else, the answer is the same answer it’s been for fifty years. Soap, water, and a little consistency.
Replacement Schedule
Even with perfect cleaning, CPAP parts wear out. The general schedule looks like this:
| Component | Typical replacement |
|---|---|
| Full face mask cushion | Every month |
| Mask frame | Every three months |
| Hose | Every three to six months |
| Headgear | Every six months |
| Water chamber | Every six months |
| Disposable filter | Monthly |
| Reusable filter | Every six months |
| CPAP machine | Five years (warranty period) |
Most insurance plans in the U.S. cover replacements on roughly this cadence. Insurance also tends to require compliance data to keep approving replacements, so make sure you’re meeting the usage threshold your plan requires. There’s a fuller breakdown in my CPAP replacement schedule guide.
Cleaning on the Road
Travel makes a CPAP cleaning routine harder, but not impossible. I take my ResMed AirMini for trips because the AirSense 10 plus a stockpile of distilled water is too bulky to pack. The AirMini uses a small HumidX F20 cartridge for waterless humidification, which means there’s no water chamber to clean on the road, which is one less thing to think about.
What I do pack: a small bottle of mild dish soap, a microfiber towel, and a couple of CPAP wipes for the truly off-grid situations. A hotel sink is a perfectly good place to wash a mask cushion. Hang the hose over the towel rail to dry during the day. If I’m flying, the machine itself goes in carry-on as a medical device, which doesn’t count against the bag limit. There’s more on this in my post on camping with CPAP.
For genuine emergencies, where there’s no clean water available, a CPAP wipe gets you through a night or two. They’re not a substitute for proper washing, but they’re better than nothing.
Common Questions
Can I use vinegar on the whole machine? Use a one to three vinegar to water solution on the humidifier chamber once a month, and that’s it. Don’t use vinegar on reusable foam filters, because acidic solutions degrade the foam. And rinse thoroughly after a vinegar treatment, because nobody wants to breathe vinegar fumes through their mask.
Is tap water really that bad? Yes. The minerals in tap water don’t go away when the water evaporates. They stay behind and slowly destroy the chamber. Distilled water costs about a dollar a gallon. It’s the easiest preventative maintenance you can do.
What if I skipped cleaning for a week? Don’t panic. Do a thorough wash now, including the hose. Inspect everything carefully under good light. If you see any discoloration, mold, or persistent odor that won’t rinse out, replace the affected part. A new hose costs less than an antibiotic prescription.
Can I put parts in the dishwasher? No. Even low temperature cycles get hot enough to warp silicone, and dishwasher detergents are too harsh for medical plastics. Hand washing takes five minutes.
Are CPAP wipes a substitute for proper washing? Not really. They’re useful for travel and emergencies but they don’t physically remove oils and residue the way soap and water do. Use them as a supplement, not a replacement.
How do I know when to replace a cushion? Look for cracks at the edges, a slick feeling that won’t wash off, persistent odors, or new mask leaks despite proper fitting. When in doubt, replace it. A cushion is one of the cheaper parts in your setup, and a leaking mask wrecks therapy quality for everyone in the bedroom.
The Bottom Line
CPAP cleaning isn’t complicated. A daily cushion rinse, a weekly soak of everything that comes off the machine, a monthly vinegar rinse on the chamber, and replacements on schedule. That’s the whole thing. Once it’s a habit, it takes less time per week than brushing your teeth.
The reason it matters is the reason any of this matters. Sleep apnea is a serious condition, and CPAP only works if you actually want to put the mask on. A clean, fresh-smelling, well-maintained setup is one you’ll keep using. A grimy, smelly, neglected one is one you’ll start finding excuses to skip. The cleaning routine isn’t separate from the therapy. It’s part of how the therapy keeps working.
If you’re early in CPAP therapy and feeling overwhelmed, start with just the daily cushion rinse this week. Add the weekly soak next week. Build it from there. You don’t have to be perfect from day one. You just have to keep showing up.
Further Reading on Site
- CPAP Replacement Schedule
- Distilled Water for CPAP
- Why Does My CPAP Mask Leak?
- CPAP Rainout: What It Is and How to Stop It
- Heated CPAP Tubing
- Best CPAP Cleaner Options
- CPAP Compliance for Insurance
- How to Camp With a CPAP Machine
⚠️ MEDICAL DISCLAIMER This blog provides general information only and is not a substitute for professional medical advice, diagnosis, or treatment. Sleep apnea is a serious condition, and CPAP equipment should be used under proper medical supervision. Always consult your doctor or sleep specialist before starting, stopping, or changing any therapy. I share personal experiences as a CPAP user, not as a medical professional. Individual results vary. For medical guidance, please consult a qualified clinician or the American Academy of Sleep Medicine (aasm.org).