ResMed AirSense 11: 10 Hidden Features and Pro Tips
I still remember unboxing my first CPAP machine after being diagnosed with severe obstructive sleep apnea. I was exhausted, frustrated, and honestly a little overwhelmed. The quick-start guide showed me how to turn it on, but it didn’t teach me how to actually live with this machine beside my bed every single night.
That was years ago, and I’ve learned so much since then—mostly through trial and error.
If you’ve just started CPAP therapy with the ResMed AirSense 11, congratulations! You’ve got one of the most advanced CPAP machines on the market. But here’s the truth: the user manual only covers the basics. There are hidden features, comfort settings, and maintenance tips that most people never discover until months (or even years) into their therapy.
I’m going to share the features I wish someone had shown me on day one. These are the real-world tips that made the difference between tolerating my CPAP and actually sleeping well with it. Whether you’re brand new to CPAP or upgrading from an older model, these insights will help you get the most out of your investment—and hopefully save you some of the frustration I went through.
Why the ResMed AirSense 11 Stands Out
When I was first diagnosed with sleep apnea, I didn’t realize how life-changing proper treatment would be. I was waking up gasping for air multiple times a night, my wife said I stopped breathing, and I was so tired during the day that I’d fall asleep at my desk. The AirSense 11 changed all of that.
This isn’t just another CPAP machine—it’s sophisticated medical technology designed to make sleep apnea therapy as comfortable and effective as possible. With built-in wireless connectivity, automatic pressure adjustment, and an integrated humidifier, it addresses many of the complaints people have about older CPAP models.
The difference between my old machine and the AirSense 11? Night and day. Literally.
If you’re comparing different machines and wondering if the upgrade is worth it, check out my comprehensive guide to the best CPAP machines to see how the AirSense 11 stacks up against the competition.
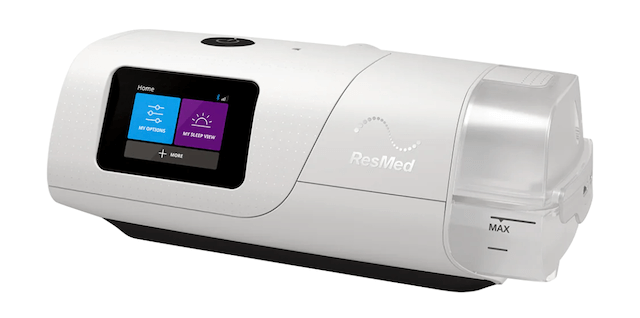
1. Add an SD Card for Personal Data Tracking
Here’s something most people don’t know: the AirSense 11 doesn’t come with an SD card pre-installed. While the machine transmits data wirelessly to your healthcare provider, having your own SD card gives you direct access to your therapy data.
To install an SD card:
- Locate the small button on the side of the machine
- Push it in to release the cover
- Insert your SD card (standard size, not micro)
- Push the cover back into place
Having this backup data can be incredibly valuable if you’re troubleshooting issues or want to track your own progress. Your therapy data includes information about your pressure levels, leak rates, and apnea events—all critical for understanding how well your treatment is working.
Speaking of pressure settings, if you’re experiencing discomfort or feeling like your therapy isn’t quite right, you’ll want to read my detailed article on CPAP pressure settings to understand how they impact your comfort and effectiveness.
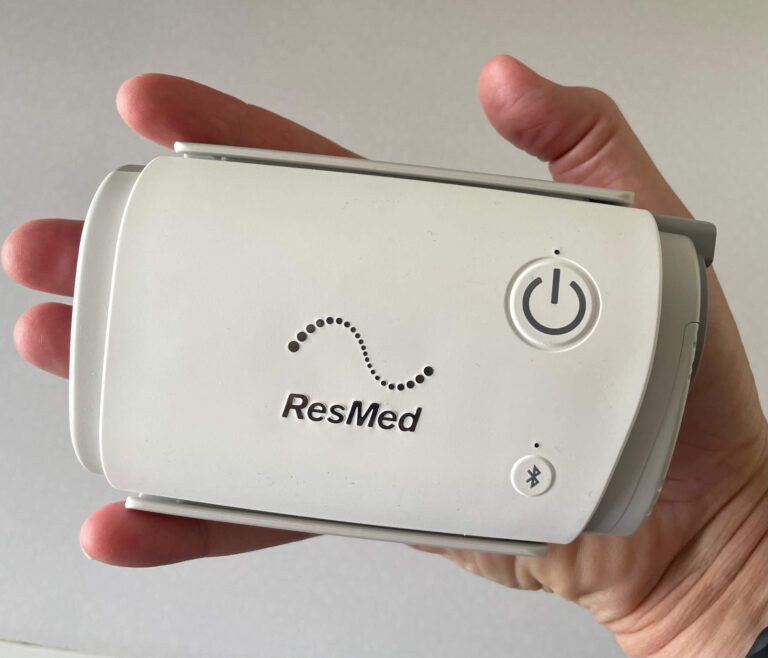
2. Master the Auto-Brightness Sensor
Waking up to a bright screen in the middle of the night is jarring. The AirSense 11 has an auto-brightness sensor on the front of the machine that you can use to your advantage.
Simply wave your hand or hold your finger over the sensor for a few seconds, and the screen will dim automatically. This feature is perfect for people who are sensitive to light when sleeping or share a bedroom with a partner.
3. Travel Without the Humidifier
This is a game-changer for frequent travelers. You can remove the entire water chamber and replace it with a side cover, making the machine significantly lighter and more compact.
Here’s how to do it:
- Remove the water chamber by pulling it straight out
- Slide in the side cover panel (sold separately or sometimes included)
- Pack and go
Keep in mind that traveling without humidification means you’ll experience drier air therapy. If you’re prone to dry mouth or nasal irritation, you might want to consider using a full-face CPAP mask instead of a nasal mask, or bring along saline nasal spray.
For more tips on managing dryness during therapy, check out my guide on how to prevent mouth breathing on CPAP.
4. Pre-Heat Your Water Chamber
Cold water in your humidifier chamber means you’ll be waiting for warm, comfortable air when you first turn on the machine. The AirSense 11 has a pre-heat function that warms up your water 20 minutes before bedtime.
To activate the warm-up feature:
- Tap the “+” button at the bottom of the home screen
- Select “Warm Up”
- The machine will pre-heat for approximately 20 minutes
This feature ensures you start your therapy with optimal humidity and temperature from the very first breath. It’s especially helpful during cold winter months when room temperature can affect your comfort.
5. Access Advanced Clinical Settings
Most users never discover this, but you can access detailed therapy data by holding down both the home button (blue) and the settings button (purple) simultaneously for 5 seconds.
What you’ll see in advanced settings:
- Events per hour (AHI)
- Average pressure throughout the night
- Mask leak rates
- Historical data from one day up to one year
Important note: While you can view this data, DO NOT change your pressure settings without consulting your healthcare provider. Your pressure was determined during your sleep study for a specific reason, and unauthorized changes could make your therapy ineffective or even harmful.
If you’re curious about why your pressure is set at a certain level or want to understand the prescription process better, I’ve written an in-depth guide about whether you need a prescription for CPAP.
6. Clean the Pop-Out Tube Connector Weekly
This is the most overlooked maintenance task for AirSense 11 users. There’s a small connector piece on the back of the machine where your hose attaches, and it needs regular cleaning.
How to remove and clean it:
- Take out the water chamber
- Look at the back where your tube connects
- Press down on the small lever inside
- Pull out the connector piece while holding the lever down
- Wash weekly with warm, soapy water
- Let it dry completely before reinstalling
This piece can accumulate moisture, oils, and debris over time, which can affect your therapy quality and potentially lead to bacterial growth. Many users report better therapy and fewer respiratory issues after they start cleaning this component regularly.
7. Understanding Battery Backup Options
The AirSense 11 doesn’t come with a built-in battery, which means power outages can interrupt your therapy. However, there are compatible battery backup systems available for purchase.
What to consider when buying a backup battery:
- Check manufacturer compatibility with the AirSense 11
- Calculate how many hours of therapy you need
- Test it BEFORE you travel or rely on it during a power outage
- Consider whether you need it to power the humidifier (which uses significantly more energy)
This is particularly important if you:
- Live in an area with frequent power outages
- Camp or travel in an RV
- Have severe sleep apnea and cannot safely sleep without therapy
8. The Humidifier Cool-Down Mode
After you turn off your machine, you might notice a snowflake icon appear in the corner of the screen and feel air flowing through your tube. Don’t worry—nothing is broken.
This is the humidifier cool-down mode, which runs for 15-20 minutes after each use. It pushes air through the system to dry out your hose and prevent moisture buildup, which can lead to mold or bacteria growth.
Pro tip: Don’t disconnect your hose immediately after shutting off the machine. Let the cool-down cycle complete for better equipment longevity and hygiene.
9. Optimize Your Mask Fit for the AirSense 11
Even the best CPAP machine won’t work properly if your mask doesn’t fit correctly. The AirSense 11 has built-in leak detection and will show you leak rates in the advanced settings menu (mentioned in tip #5).
Common signs your mask needs adjustment:
- Air blowing toward your eyes
- Red marks on your face that last more than 30 minutes
- Mouth breathing during sleep (even with a nasal mask)
- High leak rate data on your machine
If you’re struggling with mask fit, I strongly recommend reading my comparison of nasal vs. full-face CPAP masks to understand which style might work better for your sleeping position and breathing patterns.
You might also benefit from investing in a CPAP-specific pillow designed to accommodate your mask without causing pressure points or leaks. The right pillow made a massive difference in my own therapy compliance.
10. Combine Multiple Features for Maximum Comfort
The real power of the AirSense 11 comes from using multiple features together:
My recommended bedtime routine:
- Fill the water chamber with distilled water
- Activate the warm-up function 20 minutes before bed
- Dim the screen using the auto-brightness sensor
- Put on your properly fitted mask
- Let auto-ramp gradually increase pressure as you fall asleep
This combination creates the most comfortable therapy experience possible. The warm, humidified air prevents dryness, the dimmed screen doesn’t disrupt your sleep environment, and the gradual pressure ramp helps you fall asleep before reaching therapeutic levels.
What If You’re Still Struggling?
Despite all these features, some people still find CPAP therapy challenging. If that’s you, don’t give up. There are alternatives and complementary therapies worth exploring:
- Oral appliances: For mild to moderate sleep apnea, sleep apnea mouth guards can be effective and more comfortable for some users
- BiPAP or ASV: If standard CPAP feels too restrictive, you might benefit from BiPAP or ASV therapy, which offers different pressure levels for inhalation and exhalation
- EPAP devices: Smaller, portable EPAP therapy options exist for travel or mild cases
Final Thoughts: Making CPAP Therapy Work for You
The ResMed AirSense 11 is packed with features designed to make sleep apnea therapy as comfortable and effective as possible. But knowing these features exist and actually using them are two different things.
I’ll be honest with you: the first few weeks with CPAP were rough. I felt like I was wearing scuba gear to bed. But once I learned these tips and started using the machine’s features properly, everything changed. Now I can’t imagine sleeping without it. The difference in my energy, my mood, my health—it’s been life-changing.
Start with one or two tips from this article and gradually incorporate others as you get more comfortable with your machine. Track your progress using the SD card data, pay attention to how you feel each morning, and don’t hesitate to reach out to your sleep specialist if something doesn’t feel right.
Remember, successful CPAP therapy isn’t just about having the right machine—it’s about finding the right combination of equipment, settings, and habits that work for your unique situation. Give yourself grace during the adjustment period. It gets easier.
If you found this guide helpful, explore more CPAP resources on my site:
CPAP Success:
- Your first night with CPAP
- How to get used to CPAP therapy
- Troubleshooting CPAP problems
- How to stay consistent with CPAP therapy
Lifestyle and Health:
Your journey to better sleep starts with understanding your equipment. The AirSense 11 is a powerful tool—now you know how to use it to its full potential.
⚠️ MEDICAL DISCLAIMER This blog provides general information only and is not a substitute for professional medical advice, diagnosis, or treatment. Sleep apnea is a serious condition, and CPAP equipment should be used under proper medical supervision. Always consult your doctor or sleep specialist before starting, stopping, or changing any therapy. I share personal experiences as a CPAP user, not as a medical professional. Individual results vary. For medical guidance, please consult a qualified clinician or the American Academy of Sleep Medicine (aasm.org).