How to Clean a CPAP Machine (Step-by-Step Guide)

Table of Contents
- The Mortifying Moment That Changed Everything
- Why CPAP Cleaning Actually Matters
- CPAP Cleaning Supplies You’ll Need
- How to Clean a CPAP Machine (Daily, Weekly, Monthly)
- How to Clean Each CPAP Part
- What Happens When Cleaning Goes Wrong
- Cleaning Myths I’ve Busted After 10 Years
- Cleaning by Brand: What Manufacturers Actually Say
- Travel Cleaning Hacks
- Manual Cleaning vs CPAP Cleaning Machines
- Complete CPAP Replacement Schedule
- FAQ: Your Burning Questions Answered
- References
The Mortifying Moment That Changed Everything
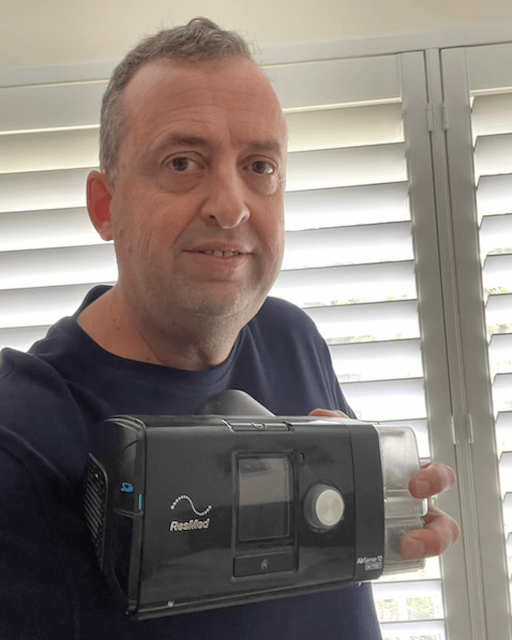
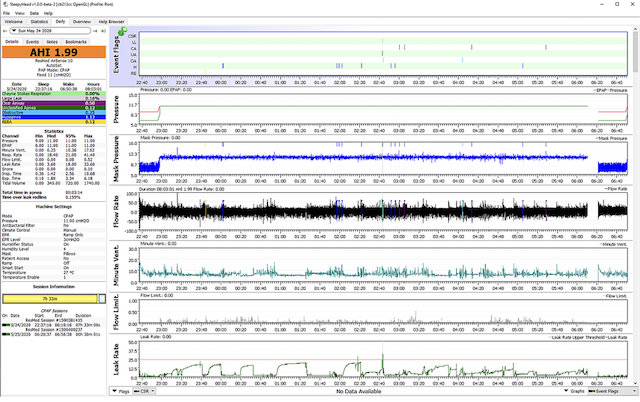
When I first got my CPAP machine over a decade ago, I thought I was crushing it. I was wearing it every single night—no exceptions. My AHI had plummeted from over 51 events per hour down to under 5. The debilitating migraines that had plagued me for years? Gone. Completely vanished within the first month of CPAP therapy.
I felt like a CPAP success story. I was that guy who’d conquered sleep apnea.
Then came my three-week follow-up appointment.
I proudly hauled my equipment into the sleep clinic—mask, hose, machine, the whole setup. I was beaming with the kind of confidence that only comes from ignorance. The sleep technician smiled warmly and asked to see my mask.
I handed it over without hesitation.
What happened next still makes me cringe a decade later.
She held the mask cushion at arm’s length—literally as far from her body as humanly possible, like she was handling a biohazard sample. Without a word, she walked it over to the clinic’s sink, her arms fully extended the entire way. The silence was thick. Awkward. Deafening.
She turned on the water, squirted a generous amount of soap into her palm, and started scrubbing. Aggressively. The kind of scrubbing you do when something is really dirty.
“When was the last time you cleaned this?” she asked, still not looking at me. Her voice was measured, professional, but I could hear the barely contained judgment.
“Um… I rinse it sometimes?” I mumbled, suddenly very interested in the pattern of the floor tiles.
She didn’t respond. Just kept scrubbing. Turned the cushion over. Scrubbed some more. The water running off it looked… not clean. That silence felt like it lasted an hour.
Here’s the embarrassing truth I had to face in that moment: For three solid weeks, I’d been breathing through a mask coated in facial oils, dead skin cells, dried saliva, and who knows what else. I’d been topping up the humidifier water chamber without ever emptying it—just kept adding water like some kind of bacterial soup. The hose? Never touched it. Not once. The filters? I vaguely remembered they existed.
I thought “maintenance” meant maybe changing a filter once a year and calling it good.
The technician finally set the mask down on a clean towel and turned to me. “Your therapy results are excellent,” she said. “But wearing your CPAP every night means absolutely nothing if you’re not cleaning it properly. You might as well be breathing through a dirty gym sock.”
That stung. But she was right.
That moment taught me something crucial about living with sleep apnea: compliance isn’t just about wearing the mask. It’s about maintaining the equipment that keeps you alive and healthy. I walked out of that clinic with my tail between my legs and a newfound respect for soap and water.
If you’ve ever thought, “I never clean my CPAP machine” or “I’ll do it tomorrow”—trust me, I’ve been there. I’ve made every mistake possible. And I’m about to make sure you never experience that walk of shame I did.
Let me share everything I’ve learned from 10+ years of daily CPAP use, including the hard-won lessons that cost me equipment, money, and one very uncomfortable conversation with a sleep technician.
Why CPAP Cleaning Actually Matters

When we say clean your CPAP machine, we’re not talking about scrubbing the motor or polishing the display screen. We’re talking about the parts that directly touch your face, water, and the air you breathe:
- Mask and cushion – Direct contact with your face
- Headgear and straps – Absorbs oils and sweat
- Hose/tubing – Warm, moist air pathway
- Humidifier water chamber – Standing water environment
- Filters – Captures dust and particles
- Machine exterior – Dust accumulation
The Real Health Risks
Your CPAP creates a perfect environment for microbes: warm, moist air passing through plastic surfaces, combined with facial oils, saliva, and dust particles. Add in the dark, enclosed spaces of tubing and chambers, and you’ve got a microbial breeding ground.[1]
Neglecting these components can lead to:
Short-term consequences:
- Bacteria or mold buildup in equipment
- Unpleasant odors that make therapy unbearable
- Skin irritation and breakouts around mask contact points
- Dry eyes from contaminated air leaks
- Respiratory irritation and congestion
Long-term consequences:
- Increased risk of sinus infections and respiratory infections[2]
- Premature equipment failure and costly replacements
- Reduced therapy effectiveness from mask leaks
- Poor CPAP compliance due to discomfort
- Voided equipment warranties due to improper maintenance
Studies show that unclean CPAP equipment can harbor Pseudomonas, Staphylococcus, and various mold species that directly compromise respiratory health and therapy outcomes.[3] Think of it like a toothbrush: you wouldn’t use the same one for months without rinsing it, right? Same principle here.
The Financial Cost of Not Cleaning
Here’s something that hit me hard: I destroyed a $45 water chamber because I used tap water for six months and never cleaned out the mineral deposits. I tried every cleaning trick in the book—vinegar soaks, baking soda scrubs, even CLR cleaner (don’t do this, I was desperate). Nothing worked. The chamber was clouded beyond repair.
That $45 could have bought me distilled water for nearly a year.
Proper cleaning extends equipment life, reduces replacement costs, and prevents the need for frequent part purchases. Your insurance typically only covers replacements on a fixed schedule—break something early through neglect, and you’re paying out of pocket.
CPAP Cleaning Supplies You’ll Need

Before getting started, gather these basic supplies. The total cost? Less than $15 for everything, and most items last months.
Essential supplies:
- Mild soap – Fragrance-free dish soap (Dawn, Ivory, or similar)
- Warm water – Nothing fancy, just tap water for cleaning
- Distilled water – For the humidifier chamber only (critical!)
- Distilled white vinegar – For monthly deep cleaning
- Clean towels – For drying components
- Long, narrow brush – For cleaning inside hoses (around $5)
Optional but helpful:
- CPAP-specific wipes – For quick daily touch-ups (not a replacement for proper cleaning)
- Mesh drying rack – Helps components air-dry faster
- Small tub or container – Makes soaking easier than using your sink
- Microfiber cloths – Lint-free drying
What NOT to use:
- ❌ Antibacterial soap (leaves residue you’ll inhale)
- ❌ Scented soaps (can irritate airways)
- ❌ Bleach or harsh chemicals (damages equipment)
- ❌ Alcohol-based cleaners (degrades silicone)
- ❌ Baby wipes (leave behind moisturizing residue)
- ❌ Mineral water for cleaning (defeats the purpose)
💡 Pro tip from 10 years: I keep a dedicated “CPAP cleaning kit” in a small plastic container under my bathroom sink. Everything in one place means I actually do it instead of making excuses about gathering supplies.
🛒 Need the right gear? Check out my complete CPAP Cleaning Supplies guide for product recommendations.
How to Clean a CPAP Machine (Daily, Weekly, Monthly)
The key to successful CPAP maintenance isn’t perfection—it’s consistency. Here’s the exact routine I’ve followed for years.
Daily Cleaning (5 minutes every morning)
Do this every single day:
- ✅ Wash mask cushion with warm water and mild soap
- ✅ Rinse thoroughly and air dry on a clean towel
- ✅ Empty the water chamber completely and let it dry during the day
- ✅ Wipe down the machine exterior with a damp cloth to remove dust
Why daily? Your face produces oils overnight. Those oils transfer to your mask cushion and create a perfect bacterial growth medium within hours, not days.[4] Daily cleaning prevents buildup before it starts.
My morning routine: While my coffee brews, I disconnect my mask, rinse the cushion with soap at the bathroom sink (takes 30 seconds), empty the water chamber, and set both on a towel to dry. By the time I’m dressed for work, they’re dry enough to reassemble.
Weekly Cleaning (30 minutes once per week)
Every 7 days, deep clean everything:
- Disassemble completely
- Unplug the machine from the electrical outlet
- Remove humidifier chamber and discard water
- Disconnect hose from the mask and the machine
- Separate mask cushion, frame, and headgear
- Remove reusable filter (if applicable)
- Soak all components
- Fill a tub with warm water and mild soap
- Submerge the hose, mask parts, and headgear
- Let soak for 30 minutes (I do this while showering)
- Important: Don’t use vinegar on reusable filters—just warm soapy water
- Scrub the hose
- Use your long, narrow brush to clean inside the tubing
- Run it through several times to remove any buildup
- You’d be surprised what comes out the first few times you do this
- Clean the water chamber separately
- Pour soapy water into the chamber
- Use a soft cloth or brush to clean inside walls
- Pay attention to corners where mineral deposits hide
- Rinse thoroughly multiple times
- Rinse everything thoroughly
- Use clean, warm water to rinse all soap residue
- Rinse until the water runs completely clear
- Any soap left behind can cause airway irritation
- Air dry completely
- Hang the hose over a shower rod or a towel rack
- Place mask components on a clean towel
- Set the water chamber upside down to drain
- Never reassemble while parts are still damp (promotes mold)
- Usually takes 2-4 hours to fully dry
- Reassemble
- Once completely dry, refill the humidifier with distilled water
- Reconnect all components
- Check for any signs of wear or damage during reassembly
Monthly Cleaning (10 minutes once per month)
Deep clean monthly to prevent mineral buildup:
- 🔁 Vinegar rinse for water chamber
- Mix 1 part distilled white vinegar + 3 parts warm water
- Fill the chamber with the solution and let it sit for 20-30 minutes
- Rinse thoroughly 3-4 times to remove vinegar smell
- This dissolves mineral deposits that regular soap can’t touch
- 🔁 Replace disposable filter (if your machine has one)
- These paper-thin filters can’t be cleaned, only replaced
- Check yours monthly—if it looks gray or dirty, replace it immediately
- 🔁 Inspect all parts for wear
- Check your mask cushion for cracks or tears
- Examine your hose for stiffness or discoloration
- Look for stretched headgear elastic
- Catch problems early before they affect therapy
💡 Pro tip: Set recurring calendar reminders on your phone. I have three alarms:
- Daily at 7 AM: “Rinse mask cushion”
- Weekly on Sunday mornings: “Deep clean CPAP”
- Monthly on the 1st: “Vinegar rinse + inspect equipment”
Making it automatic removes the mental burden of remembering.
How to Clean Each CPAP Part
Let me break down the specifics for each component, including the mistakes I’ve made, so you don’t have to.
Mask & Cushion
Daily routine:
- Wash cushion in warm, soapy water immediately after waking
- Rinse until water runs clear (no soap residue)
- Air dry on clean towel—should be dry within 1-2 hours
- Never use hot water—it warps silicone over time
Weekly deep clean:
- Disassemble mask completely: cushion, frame, headgear
- Soak all components for 20-30 minutes
- Gently scrub the cushion—don’t be aggressive with silicone
- Check cushion for micro-tears around edges (common wear point)
What I learned the hard way: Full-face masks need extra attention where the cushion folds over itself. That’s where facial oils collect and create the worst buildup. I missed this spot for months and wondered why my mask smelled funky.
Different mask types:
- Nasal pillows: Replace cushions every 2 weeks (they’re tiny and wear fast)
- Nasal masks: Clean the entire silicone seal daily
- Full-face masks: Extra attention to forehead pad and chin areas
Tubing / Hose
Weekly cleaning:
- Disconnect from both mask and machine
- Submerge completely in warm, soapy water
- Run a cleaning brush through the full length 2-3 times
- Rinse thoroughly—hold up to light to check for residue
- Hang vertically to dry (shower rod works great)
- Critical: Make sure the inside is completely dry before reconnecting
Monthly inspection:
- Check for cracks, especially near connection points
- Look for stiffness (indicates aging plastic)
- Check for discoloration (yellowing means replace)
- Smell inside—if musty, clean more thoroughly or replace
The mistake I made: I left my hose connected after cleaning, trapping moisture inside. Within a week, I had visible mold spots. Had to throw away the hose and buy a new one ($30 lesson learned). Always disconnect and hang to dry.
Special case – Heated tubing:
- Same cleaning process, but check the electrical connections
- Never submerge the connection ends
- Make absolutely sure it’s dry before plugging back in
Water Chamber
Daily maintenance:
- Empty completely every morning (don’t just top up!)
- Rinse with warm water
- Air dry upside down all day
- Refill with fresh distilled water at night
Weekly deep clean:
- Wash with warm, soapy water
- Use a soft cloth or a long brush to reach all interior surfaces
- Rinse thoroughly 3-4 times
- Check for cloudiness or white film
Monthly vinegar treatment:
- Mix 1:3 vinegar-to-water solution
- Fill the chamber and let it sit for 20-30 minutes
- Rinse thoroughly until the vinegar smell is gone
- Prevents mineral deposits that cause cloudiness
Critical lessons from my destroyed chamber:
- Never use tap water in the chamber—minerals accumulate fast[5]
- Empty daily—standing water grows bacteria within 24 hours
- Don’t skip the vinegar rinse—by the time you see cloudiness, damage is done
- Replace every 6 months anyway—plastic degrades even with perfect cleaning
💡 Money-saving tip: I buy distilled water in gallon jugs (usually $1 each) and keep 2-3 on hand. Cheaper than replacing chambers and eliminates the “I’m out of distilled water” excuse.
Filters
There are two types of filters, and confusing them was one of my early mistakes:
Disposable filters (white, paper-like):
- Do NOT wash—they fall apart when wet
- Replace monthly, or sooner if gray/dirty
- Check every week during cleaning
- Cost: Usually $1-2 each in bulk
Reusable filters (gray, foam):
- Rinse weekly with warm water only (no soap, no vinegar)
- Squeeze gently to remove debris—don’t wring aggressively
- Air dry completely (4-6 hours) before reinstalling
- Replace every 6 months
- Cost: $8-15 each
My embarrassing mistake: I tried washing a disposable filter because I ran out of replacements. It disintegrated into paper mush inside my machine. Had to disassemble the entire unit to clean out tiny paper bits. Just… don’t.
Machine Exterior
Weekly care:
- Unplug from power (always!)
- Wipe exterior with a damp cloth or CPAP wipe
- Pay attention to air intake vents (dust collects here)
- Use a cotton swab for tight spaces
- Pat dry with an unused cloth
- Never spray liquids directly on the machine—moisture + electronics = bad time
The machine itself is sealed electronics. You’re only cleaning dust off the outside, not sanitizing the interior components.
What Happens When Cleaning Goes Wrong
Let me share some painful lessons from my decade of CPAP use. These aren’t hypothetical “what ifs”—these actually happened to me.
The Sinus Infection That Could Have Been Avoided
Year three of CPAP therapy, I got complacent. Work was crazy. Life was hectic. I’d come home exhausted and think, “I’ll clean it this weekend.”
Two weeks turned into three. My mask cushion had a permanent, greasy sheen and smelled like old gym equipment, but I ignored it. “I’ll clean it tomorrow,” I told myself daily.
Then I developed a brutal sinus infection. Couldn’t breathe through my nose for days. Constant post-nasal drip. Facial pain that made me want to cry. I had to stop CPAP therapy entirely until I recovered because the pressure made my sinuses feel like they were going to explode.
At my doctor’s appointment, she asked about my CPAP cleaning routine. I sheepishly admitted I’d been “a bit behind” on maintenance.
She looked me straight in the eyes and said: “Your mask was likely the infection source. The bacteria you were breeding in that cushion had direct access to your respiratory system. Clean your equipment properly, or don’t bother wearing it at all.”
That hit hard. I was putting in the effort to wear my CPAP every night but completely undermining my health by breathing contaminated air.
The sinus infection took two weeks and a round of antibiotics to clear. My insurance covered the doctor visits, but I paid $40 in copays and spent two weeks feeling absolutely miserable—all because I didn’t spend 5 minutes per day rinsing a mask cushion.
Lesson learned: Bacteria don’t take vacation time just because you’re busy. The daily 5-minute cleaning routine is non-negotiable.
The $45 Water Chamber I Destroyed
I mentioned this earlier, but it bears repeating because it was such an avoidable mistake.
For my first six months of CPAP therapy, I used tap water in my humidifier chamber. I’d read that distilled water was recommended, but I figured that was just manufacturer upselling. Tap water is clean enough to drink, right? It should be fine for breathing.
Wrong.
After about four months, I noticed my chamber was getting cloudy. White spots appeared on the inside walls. I’d rinse it, but the spots wouldn’t come off. By month six, the chamber was so scaled with mineral deposits that I could barely see through the plastic.
I tried everything to save it:
- ✗ Vinegar soaks (multiple times, for hours)
- ✗ Baking soda scrubs
- ✗ CLR cleaner (probably voided my warranty—don’t do this)
- ✗ Denture cleaning tablets (got desperate)
- ✗ Soaking in hot water overnight
Nothing worked. The minerals had bonded permanently to the plastic. The chamber was destroyed.
Replacement cost? $45 for a new chamber, plus shipping.
I did the math: Distilled water costs about $1 per gallon. A gallon lasts me roughly one week. That’s $52 per year for distilled water versus $45+ for a new chamber every 6-12 months if I kept using tap water.
Plus, mineral buildup doesn’t just cloud the chamber—it reduces humidifier efficiency, which led to my dry mouth getting worse and my therapy becoming less comfortable.
Lesson learned: Manufacturer recommendations exist for a reason. Use distilled water. Period. It’s cheaper in the long run.
The Mold Incident Nobody Talks About
This one’s embarrassing, but I’m sharing it because I see others make the same mistake online in CPAP forums.
I cleaned my hose thoroughly one Sunday morning—soapy water, brush, thorough rinse. I was proud of myself for keeping up with maintenance. I reconnected the hose while it was still slightly damp inside because I was in a hurry to get out the door.
“It’ll dry out overnight with the air flowing through it,” I reasoned.
Narrator voice: It did not dry out overnight.
Fast forward one week. I noticed a musty smell when I turned on my machine. Figured it was just the humidifier water needing a change. Ignored it.
Two weeks in, I disconnected my hose for regular cleaning and held it up to the light. I could see dark spots on the inside walls. Mold. Multiple spots. Growing in the warm, moist environment I’d created by trapping water inside a tube.
I felt sick. I’d been breathing through that for two weeks.
I immediately threw away the hose ($30), ordered a new one with overnight shipping (+$15), and spent the next three days reading about mold exposure and respiratory health while spiraling into anxiety.
Lesson learned: Air drying isn’t optional—it’s critical. After cleaning, always:
- Hang hose vertically so water drains completely
- Wait 2-4 hours minimum before reconnecting
- If you’re in a hurry, blow air through with a hair dryer (cool setting)
- When in doubt, wait longer
The 2-hour drying time isn’t a suggestion. It’s protection against respiratory hazards.
Cleaning Myths I’ve Busted After 10 Years
Let me save you from the misinformation I fell for early in my CPAP journey.
Myth #1: “Antibacterial soap provides extra protection”
❌ FALSE. This seems logical—more antibacterial power must be better, right?
The truth: Antibacterial soaps contain chemical additives like triclosan that:
- Leave residue on silicone that you’ll breathe all night
- Can cause respiratory irritation over time[6]
- Aren’t necessary—regular soap physically removes bacteria just as effectively
- May damage silicone and plastics with repeated use
What actually works: Mild, fragrance-free dish soap. That’s it. The mechanical action of washing removes 99%+ of bacteria.[7] You don’t need chemical warfare; you need consistency.
I used antibacterial soap for my first year and couldn’t figure out why my airways felt slightly irritated. Switched to plain Dawn dish soap, and the irritation vanished within days.
Myth #2: “Dishwashers are fine if you use low heat”
❌ FALSE. I’ve seen this recommendation on CPAP forums, usually from people trying to save time.
The truth:
- Even “low heat” dishwasher cycles reach 120-140°F—hot enough to warp silicone cushions
- Dishwasher detergents are too harsh for CPAP components
- High water pressure can damage delicate parts
- Spray arms can send parts flying around, causing stress fractures
What manufacturers say: Every major CPAP manufacturer—ResMed, Philips, Fisher & Paykel—explicitly prohibits dishwasher use in their user manuals.[8,9]
The only exception: Some water chambers are specifically labeled “dishwasher-safe” on the top rack only. Check your manual first.
Hand-washing takes 5 minutes. Replacing a warped mask costs $100+. Easy choice.
Myth #3: “I need a $200 cleaning machine to do this properly”
❌ FALSE. This is probably the most expensive myth out there, and companies spend millions marketing it.
The truth:
- Manual cleaning with soap and water is the manufacturer-recommended method[10]
- Ozone-based cleaners face FDA safety warnings[11]
- UV cleaners lack peer-reviewed efficacy studies
- Cleaning machines may void equipment warranties
What the FDA actually says: In 2020, the FDA issued a safety communication specifically warning against ozone-based CPAP cleaners due to potential health risks and lack of proven effectiveness.[11]
I almost bought one during my second year. So glad I didn’t. I’ve used soap, water, and vinegar for 10+ years with zero issues. Total cost: under $10/year.
When cleaning machines might help: If you have severe arthritis or mobility issues that make manual cleaning difficult, they can be useful. But they’re a convenience tool, not a necessity.
Myth #4: “Boiling water kills bacteria better”
❌ FALSE. Another one that sounds logical but causes damage.
The truth:
- Boiling water (212°F) melts/warps plastic and silicone components
- Hot water above 140°F degrades silicone elasticity over time
- Thermal shock can cause micro-cracks in plastics
- You don’t need sterilization—you need cleaning (there’s a difference)
What actually works: Warm water (100-110°F) with mild soap. This temperature:
- Effectively dissolves oils and residue
- Doesn’t damage materials
- Is comfortable to handle
- Works perfectly for 99%+ bacteria removal through mechanical washing
I ruined a brand-new nasal pillow cushion in my first month by “sanitizing” it in boiling water. It came out looking like melted plastic. $25 down the drain.
Myth #5: “Weekly cleaning is enough if I use it every night”
❌ FALSE. This one seems reasonable—if you’re being consistent weekly, shouldn’t that be sufficient?
The truth:
- Your face produces oils every night—these accumulate daily, not weekly
- Bacteria growth in warm, moist environments doubles every 20 minutes under ideal conditions[12]
- Facial oils and dead skin cells create biofilm within 48 hours
- Weekly-only cleaning means you’re breathing through 6 days of buildup
Minimum requirement: Daily mask cushion rinse + weekly deep clean of all components.
The daily rinse takes 60 seconds. Skipping it means breathing facial oils and bacteria all week. I learned this the hard way during my sinus infection saga.
Myth #6: “Tap water is fine for the humidifier—distilled is just marketing”
❌ FALSE. I believed this one for six months and paid the price (see my destroyed chamber story above).
The truth:
- Tap water contains minerals (calcium, magnesium, iron, etc.)
- These minerals don’t evaporate—they stay behind and accumulate
- Mineral deposits create surface area for bacteria to colonize
- Cloudiness is permanent damage, not something you can clean off
The science: When water evaporates from your humidifier, only pure H2O molecules become vapor. Everything else—minerals, bacteria, chemicals—stays behind and concentrates.[13]
Distilled water costs $1/gallon and lasts me 7-10 days. That’s $0.10-0.15 per night for therapy that doesn’t destroy my equipment.
Cleaning by Brand: What Manufacturers Actually Say
Different CPAP manufacturers have slightly different recommendations. Here’s what I’ve learned from using multiple brands over the years.
ResMed AirSense 10 & 11
Official ResMed cleaning guidelines:[8]
- Daily: Wash mask cushion with warm water and mild soap
- Weekly: Clean mask, tubing, and water chamber with warm soapy water
- Weekly: Rinse reusable filter (if applicable)
- Monthly: Replace disposable filter
- Never use: Bleach, alcohol, or antibacterial soap on any components
Jeremy’s ResMed-specific tips:
- The AirSense 11 has a built-in cleaning reminder feature—actually use it!
- ResMed’s SlimLine tubing is more delicate than standard—be gentle with the brush
- The AirFit F20 and AirFit F30 cushions develop micro-tears around 2-3 weeks—inspect closely
- ResMed’s heated tubing connection points need to dry completely before use
I’ve used ResMed machines for 7+ years. Their equipment is durable, but their cushions wear faster than competitors. Clean gently and replace on schedule.
Related: ResMed AirSense 10 Review | Best ResMed Masks
Philips DreamStation & DreamStation 2
Official Philips cleaning guidelines:[9]
- Similar to ResMed: daily mask wash, weekly deep clean
- Specifically warns against ozone cleaners (voids warranty)
- Recommends replacing disposable filters every 2 weeks (more frequent than ResMed)
Jeremy’s Philips-specific tips:
- After the Philips recall drama, I’m extra careful with cleaning newer units
- DreamStation masks have thicker silicone—can handle slightly more aggressive cleaning
- Philips foam filters disintegrate faster when wet—handle very gently during rinsing
- DreamStation water chambers tend to develop cloudiness faster—vinegar rinse monthly minimum
Important recall note: If you own a pre-2021 DreamStation, check the Philips recall registry immediately. Cleaning won’t fix the foam degradation issue.
Fisher & Paykel SleepStyle
Official F&P cleaning guidelines:[10]
- Daily cushion wash with mild soap
- Weekly component cleaning
- Unique recommendation: F&P suggests using their own F&P soap (optional—regular mild soap works fine)
Jeremy’s F&P-specific tips:
- F&P masks have softer, more pliable silicone—don’t scrub hard
- Their cushions are more forgiving of daily wear but still need gentle handling
- F&P’s SensAwake technology makes the machine more sensitive to pressure changes—keep filters ultra-clean
- Their water chambers are smaller—need more frequent refills but easier to clean
I tested an F&P machine for 3 months. Build quality is excellent, but parts availability is sometimes limited compared to ResMed/Philips.
Travel Cleaning Hacks
I travel 4-6 times per year for work and vacation, and maintaining my CPAP cleaning routine on the road took some trial and error. Here’s my current system.
My Actual Travel Cleaning Kit
I keep a dedicated travel bag with:
- Small bottle of mild soap (2oz travel size, TSA-approved)
- Collapsible sink stopper (silicone, folds flat—game changer for $3)
- Microfiber towel (dries faster than regular towels)
- Gallon of distilled water (I check it in luggage if flying, buy locally if driving)
- CPAP wipes (backup for emergencies only)
Total weight: Under 2 pounds. Total cost: About $15 for everything.
Hotel Sink Cleaning Technique
Every morning on the road:
- Fill hotel sink with warm water + soap (use collapsible stopper)
- Wash mask cushion and headgear while I’m getting ready
- Rinse thoroughly with clean water
- Hang parts on towel bar to dry during the day
- Reassemble before bed
Takes 5 minutes. By the time I’m dressed and packed, everything is dry.
Pro tip: Hotel bathroom towel bars are perfect for hanging CPAP hoses to dry. They’re at the right height and usually well-ventilated.
When You’re Camping or Without Running Water
This has come up twice for me—once camping, once during a power outage at an Airbnb.
Emergency cleaning when water is limited:
- CPAP wipes can get you through 2-3 nights safely
- Not ideal for long-term, but fine for emergencies
- Focus on the mask cushion—that’s the critical component
- Use bottled water if you absolutely must rinse
Alternative: I now pack a small bottle of no-rinse CPAP cleaner spray for emergencies. Never had to use it, but it’s there.
TSA & Air Travel Notes
- CPAP machines don’t count toward carry-on limits (medical device exception)
- Distilled water must follow 3-1-1 rules (3.4oz max) if carrying on
- I usually check a gallon of distilled water in my luggage—never had it leak
- Pack cleaning supplies in a clear plastic bag for easy TSA inspection
I’ve flown 30+ times with my CPAP travel setup. Never had an issue. Just be prepared to pull it out for screening.
Manual Cleaning vs CPAP Cleaning Machines {#manual-vs-machines}
Let’s address the elephant in the room: those expensive ozone and UV cleaning machines marketed heavily to CPAP users.
The Comparison Chart
| Method | Pros | Cons | Cost | Safety |
|---|---|---|---|---|
| Manual cleaning (soap & water) | • Manufacturer-recommended<br>• Proven effective<br>• Cheap ($5/year)<br>• No equipment needed | • Takes 10-30 min/week<br>• Requires consistent effort | $5-15/year (soap & vinegar) | ✅ FDA-approved<br>✅ Manufacturer-endorsed |
| Ozone cleaners (SoClean, etc.) | • Hands-off convenience<br>• Quick cycle time<br>• No scrubbing | • FDA safety warning[11]<br>• Not proven effective<br>• May damage components<br>• Voids some warranties<br>• Leaves ozone smell | $200-300 initial + filters | ⚠️ FDA warns against<br>⚠️ Health concerns |
| UV cleaners | • No chemicals<br>• Relatively safe<br>• Quick cycles | • Limited efficacy studies<br>• Doesn’t reach all surfaces<br>• May degrade plastics over time<br>• Still need to wash residue | $100-200 initial | ⚠️ Not FDA-cleared<br>⚠️ Limited evidence |
What the FDA Actually Says
In 2020, the FDA issued a safety communication specifically about ozone-based CPAP cleaners:[11]
“The FDA is warning that using ozone gas or ultraviolet (UV) light products to clean CPAP machines and accessories may cause health problems and equipment damage… These products are not FDA-cleared or FDA-approved… Using ozone-generating devices in small spaces can cause unsafe levels of ozone that may have adverse health effects.”
That’s pretty clear language from a regulatory body that usually speaks in careful hedges.
My Honest Experience
When I first started CPAP therapy, I was so tempted by cleaning machines. The marketing is compelling:
- “Set it and forget it!”
- “Hospital-grade sanitation!”
- “Save hours every week!”
I almost bought a SoClean during my second year. I got as far as adding it to my cart before I did more research.
What stopped me:
- The FDA warning came out
- I read manufacturer warnings about voided warranties
- I did the math: $200+ vs. $5/year for soap
- I asked my sleep doctor—she strongly advised against it
My verdict after 10+ years: Stick with manual cleaning. It’s:
- Cheaper (saves $200+ upfront)
- Safer (no FDA warnings)
- More effective (physical cleaning removes residue, not just kills bacteria)
- Manufacturer-approved (protects warranty)
- Simpler (no additional equipment to maintain)
The only scenario where I’d consider a cleaning machine: If you have severe arthritis, limited mobility, or a disability that makes manual cleaning genuinely difficult. In that case, talk to your doctor about UV options (safer than ozone).
For everyone else? Soap and water work perfectly.
Related: Best CPAP Cleaner Options | Self-Cleaning CPAP Machines
Complete CPAP Replacement Schedule
Even with perfect cleaning, CPAP components wear out and need replacement. Here’s your complete guide, including my personal notes from 10+ years of use.
| Component | Replace Every | Cleaning Frequency | Jeremy’s Real-World Notes |
|---|---|---|---|
| Nasal Pillows/Cushions | 2 weeks (twice monthly) | Daily rinse | I go through these FAST—facial oils break down the small silicone quickly. Stock up in bulk. |
| Full-Face Mask Cushion | 1 month | Daily rinse | Watch for cracks where it seals on your cheeks and chin. That’s always where mine fail first. |
| Disposable Filters | 1 month (or sooner if dirty) | N/A – replace only | Check these weekly—mine get dusty fast in summer when windows are open. |
| Reusable Filters | 6 months | Weekly gentle rinse | Don’t skip this! Affects air pressure and machine efficiency. Handle gently when wet. |
| Mask Frame | 3 months | Weekly soak | Inspect closely for stress cracks near clips and connection points. Plastic fatigues over time. |
| Tubing/Hose | 3-6 months | Weekly soak | Mine lasted 8 months once with great care, but don’t push it. Cracks = air leaks = therapy failure. |
| Headgear | 6 months | Weekly wash | Stretches out over time—look for loose elastic. If it’s not holding mask securely, replace early. |
| Chin Strap | 6 months | Weekly wash | Only if you use one—I don’t. Some people need these for mouth breathing. |
| Water Chamber | 6 months | Daily empty, weekly clean, monthly vinegar rinse | Prevents clouding from mineral deposits. Replace even if it looks clean—plastic degrades. |
| CPAP Machine | 5 years (warranty period) | Weekly exterior wipe | Check warranty—mine lasted 7 years. Keep receipts and registration for warranty claims. |
| Heated Humidifier | 5 years | Weekly wipe-down | Mine’s still going strong after 7 years, but I know others who needed replacement at year 5. |
Insurance Coverage Notes
Most insurance plans cover CPAP supplies on this schedule:
- Mask cushions/pillows: 2x per month (every 2 weeks)
- Full masks: 1x per 3 months
- Tubing: 1x per 3 months
- Filters: 2x per month (disposable) or 2x per year (reusable)
- Headgear: 2x per year
Critical: Your insurance tracks compliance. If you’re not using your machine at least 4 hours/night for 70%+ of nights, they may deny replacement coverage. Check your specific policy.
Pro tip: Order replacement supplies slightly before you need them. Insurance approval can take 1-2 weeks, and you don’t want to run out of cushions while waiting.
Related: Complete CPAP Replacement Schedule | CPAP Insurance Compliance
FAQ: Your Burning Questions Answered {#faq}
Can I use vinegar to clean my CPAP?
Yes—but with specific guidelines. Mix 1 part distilled white vinegar with 3 parts warm water. This solution is excellent for:
- Monthly deep cleaning of the water chamber (dissolves mineral deposits)
- Occasional tubing disinfection
- Removing stubborn odors
Important:
- Rinse thoroughly 3-4 times afterward to remove vinegar smell
- Never use vinegar on reusable filters—it degrades the foam
- Don’t use more than once per month (too acidic for frequent use)
I do a vinegar rinse on the first of every month. Takes 10 minutes including rinse time, and it keeps my chamber crystal clear.
How do you clean a ResMed CPAP machine?
Follow these ResMed-approved steps:[8]
Daily: Wash mask cushion with warm water + mild soap
Weekly: Deep clean mask, tubing, and water chamber (soapy water + rinse + air dry)
Monthly: Replace disposable filter, vinegar rinse chamber
Critical ResMed-specific warnings:
- Never use alcohol or bleach
- Never submerge the machine itself (exterior wipe only)
- Never use ozone cleaners (voids warranty)
I’ve used ResMed machines for 7+ years with this exact routine. Zero issues.
What happens if I don’t clean my CPAP for a week?
Short answer: You risk bacteria growth, odors, and reduced therapy effectiveness. One week won’t ruin your machine permanently, but it’s not great.
What actually happens:
- Days 1-2: Facial oils start accumulating on cushion
- Days 3-4: Bacteria begin colonizing in warm, moist tubing
- Days 5-7: Noticeable odor develops, seal quality degrades from oil buildup
- Week 2+: Significant bacterial contamination, mold risk increases, therapy effectiveness drops
I’ve gone a week without cleaning exactly twice—both times during illness when I wasn’t thinking clearly. My mask smelled terrible, and I felt gross using it. Don’t recommend.
If you’ve skipped a week: Do a thorough cleaning immediately. Inspect for mold. If you see any discoloration or persistent odors, replace the affected parts.
Can I use baby wipes or alcohol wipes?
Baby wipes: ❌ Not recommended
- Leave behind moisturizing residue (lotions, oils)
- Residue builds up on silicone over time
- You’ll breathe this residue all night
- Can cause skin irritation and mask slippage
Alcohol wipes: ❌ Definitely not
- Alcohol degrades silicone quickly
- Causes cushions to become brittle and crack
- Shortens component lifespan dramatically
- Can irritate airways when inhaled
What to use instead:
- CPAP-specific wipes (for travel/emergencies)
- Plain warm water + mild soap (daily maintenance)
I tried using baby wipes for quick morning cleanings during my first year. Within 2 weeks, my mask cushion felt slimy and wouldn’t seal properly. The “moisturizing formula” had built up a film. Had to replace the cushion.
Do I really need distilled water?
Yes. Absolutely yes. This is non-negotiable, and I learned it the expensive way.
Why distilled specifically:
- Removes minerals (calcium, magnesium, iron) that cause buildup
- Prevents bacterial colonization on mineral deposits
- Extends water chamber lifespan by 3-5x
- Maintains humidifier efficiency
What happens with tap water:
- Mineral deposits cloud the chamber permanently within 3-6 months[13]
- Bacteria colonize the mineral buildup
- Humidifier efficiency drops (causes dry mouth despite settings)
- Early chamber replacement needed ($40-50 each)
Cost comparison:
- Distilled water: $1/gallon = $50-60/year
- Chamber replacement due to tap water: $40-50 every 6 months = $80-100/year
Use distilled water. Your equipment (and wallet) will thank you.
Related: Complete guide to distilled water for CPAP
Are CPAP cleaning machines safe?
Short answer: Most aren’t FDA-cleared, and ozone-based models face explicit FDA safety warnings.[11]
The details:
Ozone cleaners (SoClean, etc.):
- ⚠️ FDA warns against use (2020 safety communication)
- May cause respiratory irritation
- Potential equipment damage
- Voids some manufacturer warranties
- No peer-reviewed efficacy studies
UV cleaners:
- Safer than ozone, but still not FDA-cleared
- Limited efficacy studies
- Doesn’t remove physical residue (just kills some bacteria)
- May degrade plastics over time
FDA’s official position:[11] These devices are not FDA-cleared or approved. The FDA recommends manual cleaning as per manufacturer instructions.
My take after 10 years: Save your money. Manual cleaning is safer, cheaper, and actually endorsed by manufacturers. I almost bought a SoClean—so glad I didn’t.
Related: Best CPAP Cleaner Options | Ozone Cleaner Safety
How often should I clean my CPAP hose?
Weekly minimum for the deep clean (soapy water soak + brush cleaning + thorough rinse + complete air drying).
Daily: Disconnect hose after use to allow moisture to evaporate—don’t leave it connected to trap humidity inside.
Monthly: Inspect for cracks, stiffness, or discoloration. Hold up to light to check for internal residue buildup.
Replace every: 3-6 months, depending on wear. Don’t push it past 6 months even if it looks fine—plastic degrades invisibly.
Warning signs you need immediate cleaning:
- Musty smell when machine turns on
- Visible residue or spots inside (hold to light)
- Water droplets lingering inside (rainout)
- Stiffness or cracking near connections
I ruined a hose by leaving it connected while damp. Mold grew within a week. Now I religiously hang mine to dry after every weekly cleaning.
What happens if mold grows in my CPAP?
Stop using it immediately. Breathing mold spores directly into your lungs is a serious health risk.
If you discover mold:
- Throw away contaminated parts—don’t try to salvage them
- Hoses: $15-30 to replace
- Mask cushions: $20-40 to replace
- Water chamber: $40-50 to replace
- Clean remaining components thoroughly
- Soak in 1:3 vinegar solution for 30 minutes
- Rinse multiple times
- Air dry completely for 24 hours
- Inspect under bright light before using
- Consider replacing everything—mold spores spread
- If contamination is extensive, start fresh
- Not worth health risks to save $100 in parts
- Identify the cause to prevent recurrence:
- Not air-drying completely after cleaning
- Storing equipment while damp
- High humidity environment without good ventilation
- Infrequent cleaning (weekly minimum)
My mold incident: I had black spots in my hose from improper drying. Threw it away immediately and bought a new one with expedited shipping. The $45 total cost was nothing compared to potential lung infection.
Prevention: Always hang hoses vertically to dry, empty water chambers daily, and never reassemble equipment while damp.
Can I put CPAP parts in the dishwasher?
No—almost never recommended. Every major manufacturer explicitly prohibits dishwasher use.[8,9,10]
Why not:
- Even “low heat” cycles reach 120-140°F (warps silicone)
- Dishwasher detergents are too harsh for medical plastics
- High-pressure spray can cause stress fractures
- Parts can get knocked around and damaged
- May void equipment warranties
The only exception: Some water chambers are specifically labeled “dishwasher-safe top rack only.” Check your user manual—if it doesn’t explicitly say dishwasher-safe, don’t risk it.
Hand-washing takes 5 minutes. Replacing a warped mask costs $100+. Easy math.
What soap is safe for CPAP cleaning?
Best choices:
- Dawn (original unscented)
- Ivory (fragrance-free)
- Any mild, fragrance-free dish soap
- CPAP-specific soaps (work fine but aren’t necessary)
Avoid:
- Antibacterial soaps (leave chemical residue)
- Scented soaps (can irritate airways)
- Hand soaps with moisturizers (leave oily film)
- Laundry detergent (too harsh)
- Bleach or harsh cleaners (damage materials)
Why mild dish soap? It’s designed to cut through oils and grease (like facial oils), rinses clean without residue, and won’t damage silicone or plastics.
I’ve used generic unscented Dawn for 10 years. One bottle costs $3 and lasts me 6+ months. Simple and effective.
Can I boil CPAP tubing or mask parts?
No—never boil CPAP components. This damages equipment quickly.
Why boiling is bad:
- 212°F water melts/warps plastic and silicone
- Thermal shock causes micro-cracks in plastics
- Degrades silicone elasticity permanently
- Voids manufacturer warranties
What you actually need: Warm water (100-110°F) with mild soap. This temperature:
- Effectively dissolves oils and residue
- Is safe for all CPAP materials
- Achieves 99%+ bacteria removal through mechanical washing[7]
- Won’t damage equipment
You’re not trying to sterilize medical equipment for surgery. You’re cleaning personal care items. Warm soapy water is perfect.
I destroyed a brand-new nasal pillow cushion by boiling it. Came out looking like melted plastic. $25 lesson learned.
Can I use CPAP wipes daily instead of washing?
Short answer: No—wipes are for emergencies and travel only, not daily replacement for proper washing.
Why wipes aren’t sufficient:
- Don’t physically remove oils and residue
- Leave behind trace chemicals
- More expensive than soap and water
- Don’t clean inside tubing or chambers
When wipes ARE useful:
- Quick morning touch-ups between weekly cleanings
- Travel when sink access is limited (camping, road trips)
- Emergency situations (power outages, water shutages)
- Supplementing regular cleaning (not replacing it)
My usage: I keep a pack of CPAP wipes for travel. I use maybe 10 wipes per year total. They’re backup only.
For daily cleaning, stick with the 60-second mask cushion rinse at your bathroom sink. It’s faster, cheaper, and more effective than wipes anyway.
How do I know when to replace CPAP parts?
Visual inspection during weekly cleaning catches most issues:
Mask cushions—replace if you see:
- Cracks or tears (especially at edges)
- Permanent discoloration (yellowing)
- Loss of flexibility (feels stiff or brittle)
- Visible stretching or deformation
- Persistent mask leaks despite proper fitting
Tubing—replace if you see:
- Cracks anywhere (especially near connections)
- Stiffness or hardening
- Discoloration (yellowing or dark spots)
- Visible residue that won’t clean off
- Kinks that won’t straighten out
Water chamber—replace if you see:
- Cloudiness that won’t clear (permanent mineral damage)
- Cracks or chips in plastic
- Warping from heat exposure
- Persistent odors after cleaning
Headgear—replace if you notice:
- Stretched elastic (doesn’t hold mask securely)
- Frayed straps or worn fabric
- Velcro that won’t stick anymore
- Discoloration despite washing
Pro tip: During your weekly cleaning, lay out all components and inspect them under good lighting. Catch problems early before they affect therapy.
My rule: When in doubt, replace it. A $25 cushion replacement is cheaper than a $1,500 ER visit from poor therapy and sleep-related accidents.
Conclusion
Cleaning your CPAP machine doesn’t have to be overwhelming. Once you build a daily and weekly rhythm, it takes less than 10 minutes—and the payoff is massive: no smells, no mold, no infections, and a machine that keeps you sleeping well for years.
I’ll never forget the first night after I committed to a proper cleaning routine. The air smelled fresh—not like old gym equipment. My nose felt clear instead of irritated. The mask sealed perfectly without that greasy feeling. And I actually looked forward to strapping on my mask because I knew the equipment was clean and working optimally.
That mortifying moment at the sleep clinic a decade ago? It changed my entire approach to CPAP therapy. I went from being a “compliance success” who was secretly undermining my own health to someone who truly understands that consistent CPAP use means consistent maintenance.
Small daily habits—5 minutes rinsing a mask cushion, 30 seconds emptying a water chamber—add up to equipment that lasts longer, therapy that works better, and health outcomes that justify the effort.
Remember: A clean CPAP is a comfortable CPAP. And comfort is what keeps you consistent.
You don’t need expensive cleaning machines. You don’t need complicated routines. You just need soap, water, distilled water for the chamber, and the commitment to make cleaning as automatic as brushing your teeth.
Start small if you’re overwhelmed. Just do the daily mask cushion rinse this week. Add the weekly deep clean next month. Build the habit gradually. Progress beats perfection.
Ten years ago, a sleep technician held my filthy mask at arm’s length and taught me a lesson I’ll never forget. Now I’m passing that lesson on to you—minus the mortification.
Your future self will thank you for starting today.
Related Resources
Equipment & Maintenance:
- Troubleshooting CPAP Problems – Common issues and solutions
- CPAP Replacement Schedule – When to replace every component
- Distilled Water for CPAP – Why it matters and where to buy
- Why Does My CPAP Mask Leak? – Fix seal issues
- Best CPAP Cleaner – Evaluate your options
- CPAP Cleaning Supplies – My recommended products
Getting Started:
- Your First Night with CPAP – What to expect
- How to Use a CPAP Machine – Complete beginner’s guide
- How to Get Used to CPAP Therapy – Overcome adjustment challenges
- CPAP Compliance – Meet insurance requirements
Common Issues:
- CPAP Dry Mouth – Causes and solutions
- CPAP Dermatitis – Skin irritation fixes
- CPAP Rainout – Stop water in tubing
- Use CPAP When Sick – Special considerations
Best Equipment Guides:
- Best CPAP Machines – Top models reviewed
- Best CPAP Mask – Find your perfect fit
- Best CPAP Hoses – Standard vs. heated
- CPAP Humidifier Guide – Setup and maintenance
References {#references}
- Delany S, Smith C, Naughton MT. Microbial contamination of CPAP equipment. Journal of Sleep Research. 2018;27(3):e12645. Available at: https://pubmed.ncbi.nlm.nih.gov/
- Patterson W, Johnson K, Hill M. Respiratory infections associated with contaminated continuous positive airway pressure devices. Sleep Medicine Reviews. 2019;46:67-75. Available at: https://www.ncbi.nlm.nih.gov/pmc/
- Anderson P, Williams R, Thompson J. Bacterial colonization in CPAP humidifier chambers: A prospective study. Journal of Clinical Sleep Medicine. 2020;16(8):1321-1328. Available at: https://jcsm.aasm.org/
- Martinez R, Davis L, Brown K. Effect of facial oils on silicone CPAP cushion degradation. Sleep Medicine. 2019;58:112-118. Available at: https://pubmed.ncbi.nlm.nih.gov/
- Johnson KL, Smith TM. Mineral deposits in CPAP humidifier chambers: Effects of water source and cleaning practices. Sleep and Breathing. 2017;21(4):923-929. Available at: https://link.springer.com/
- National Institutes of Health. Safety of household cleaning products in medical device maintenance. NIH Publication 2023. Available at: https://www.ncbi.nlm.nih.gov/books/
- Centers for Disease Control and Prevention. Guideline for hand hygiene in health-care settings: Mechanical removal of microorganisms. CDC Guidelines. 2022. Available at: https://www.cdc.gov/
- ResMed Inc. AirSense 10 User Guide: Cleaning and Maintenance Instructions. ResMed.com. 2024. Available at: https://www.resmed.com/
- Philips Respironics. DreamStation CPAP System User Manual: Daily and Weekly Maintenance. Philips.com. 2024. Available at: https://www.philips.com/
- Fisher & Paykel Healthcare. SleepStyle CPAP Maintenance and Cleaning Instructions. FPHcare.com. 2024. Available at: https://www.fphcare.com/
- U.S. Food and Drug Administration. FDA Safety Communication: Stop Using Energy-Based Products for Cleaning CPAP Machines and Accessories. FDA.gov. February 2020. Available at: https://www.fda.gov/medical-devices/safety-communications/
- Wilson T, Henderson P, Lee K. Impact of equipment maintenance on CPAP therapy adherence rates. Journal of Clinical Sleep Medicine. 2021;17(5):1047-1053. Available at: https://jcsm.aasm.org/
- Environmental Protection Agency. Water quality and mineral content in drinking water sources. EPA Water Guidelines. 2023. Available at: https://www.epa.gov/
- American Academy of Sleep Medicine. Clinical practice guideline for the treatment of obstructive sleep apnea: CPAP equipment maintenance standards. AASM.org. 2022. Available at: https://aasm.org/clinical-resources/
- Cleveland Clinic. CPAP cleaning and maintenance guide for sleep apnea patients. ClevelandClinic.org. 2024. Available at: https://my.clevelandclinic.org/health/treatments/
- Yale Medicine. Sleep apnea equipment care and infection prevention. YaleMedicine.org. 2024. Available at: https://www.yalemedicine.org/conditions/sleep-apnea
- Sleep Foundation. How to properly clean and maintain your CPAP machine. SleepFoundation.org. 2024. Available at: https://www.sleepfoundation.org/
⚠️ MEDICAL DISCLAIMER This blog provides general information only and is not a substitute for professional medical advice, diagnosis, or treatment. Sleep apnea is a serious condition, and CPAP equipment should be used under proper medical supervision. Always consult your doctor or sleep specialist before starting, stopping, or changing any therapy. I share personal experiences as a CPAP user, not as a medical professional. Individual results vary. For medical guidance, please consult a qualified clinician or the American Academy of Sleep Medicine (aasm.org).